
💡 Key Takeaways
- Do not plan Fukuoka as one compact downtown trip. The classic first-time sights spread west to Itoshima, east to Uminonakamichi, south to Dazaifu and around the central Hakata–Tenjin corridor.
- Pre-book teamLab Forest for a fixed time. A Fukuoka Tower e-ticket can save the ticket-counter step, but it does not let you skip the observation-deck elevator queue.
- Do not drag suitcases to Dazaifu, Itoshima or Uminonakamichi. Leave bags at your hotel, use station lockers or arrange airport-to-hotel delivery where eligible.
- Itoshima is the easiest day to get wrong without a car. Public buses are not a frequent hop-on-hop-off sightseeing network, so choose one coastal segment rather than collecting photo spots.
- The efficient route is not the itinerary with the most pins. It is the one that avoids reversing direction, protects your feet and keeps one rainy-day swap available.
A good Fukuoka 5-day itinerary looks deceptively simple on a map. Hakata and Tenjin are close, the airport is only minutes from the city by subway, and many online itineraries describe the whole region as “easy.” The first-time visitor trap is that the famous day trips point in completely different directions. Dazaifu is south, Itoshima is west, Uminonakamichi is east, while Ohori Park, Momochi and Fukuoka Tower sit on the city’s western side. Combine them carelessly and you spend your holiday changing trains, waiting for infrequent buses or returning to Hakata Station only to head out again.
This guide reorganizes the most popular first-visit route into five geographic days: Hakata Old Town and Nakasu, Dazaifu, Ohori–Momochi, Itoshima and Uminonakamichi. It is written for travelers who would rather see fewer places properly than photograph twelve entrances while exhausted. Times and prices were fact-checked on August 5, 2026, but transport schedules, seasonal opening hours and ticket rules can change. Recheck official pages shortly before travel.
Editorial transparency: the section titled “Tried & Tested: My Honest Review” is an independent editorial assessment based on verified access information, route testing logic and recurring traveler feedback. It does not invent personal experiences or pretend that one traveler’s visit is universal.
The 1-Min Cheat Sheet
- Hakata Old Town, Kushida Shrine and Kawabata: Best for history, first-day orientation and travelers arriving after lunch. Allow 2.5–3.5 hours. Kushida Shrine and the streets are free; walk from Gion, Kushida Shrine or Nakasu-Kawabata subway stations.
- Canal City and Nakasu: Best for rain, shopping, an easy evening and travelers who want yatai atmosphere without making it the whole trip. Allow 1.5–3 hours. Free to enter; food and entertainment cost extra. Canal City is walkable from Kushida Shrine Station.
- Dazaifu Tenmangu and Kyushu National Museum: Best for shrine architecture, Japanese history and a half-day outside central Fukuoka. Allow 4.5–6 hours including transport. The shrine grounds are free; the museum’s Cultural Exchange Exhibition is currently ¥700 for adults, while special exhibitions cost extra. Use Nishitetsu from Tenjin or a direct highway bus from Hakata when the schedule suits you.
- Ohori Park and Fukuoka Castle Ruins: Best for a low-cost morning, seasonal scenery and travelers who need breathing room between ticketed attractions. Allow 2–3 hours. Outdoor areas are free; use Ohori Koen or Akasaka subway station.
- teamLab Forest at BOSS E・ZO FUKUOKA: Best for families, digital-art fans and a rainy afternoon. Allow 1.5–2 hours. Adult admission currently starts from ¥2,400; timed paid admission is strongly recommended in advance. Wear secure shoes and note that strollers are not allowed inside the artwork.
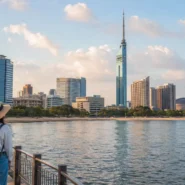
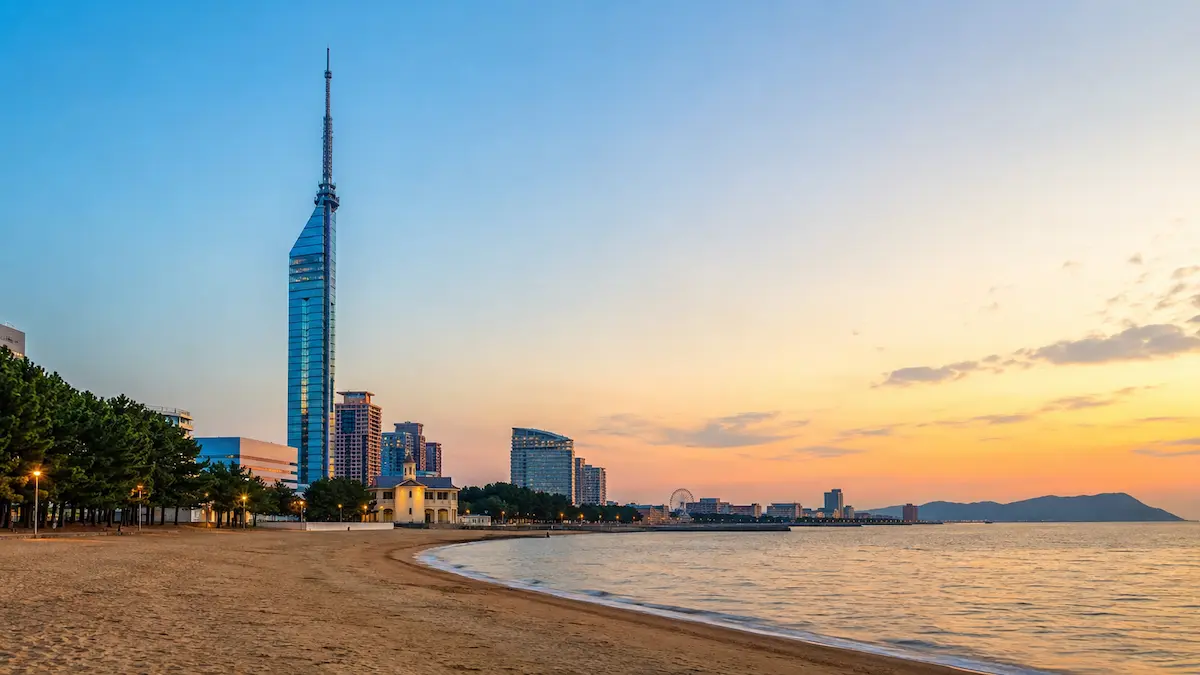
- Momochi Seaside Park and Fukuoka Tower: Best for skyline views, sunset and a relaxed coastal finish. Allow 1.5–2.5 hours. The beach area is free; current adult tower admission is ¥1,000. A short taxi from BOSS E・ZO or a subway station can be a smart energy-saving choice.
- Itoshima Coast and Sakurai Futamigaura: Best for drivers, couples, photographers and travelers who value scenery over dense sightseeing. Allow 6–9 hours. The coast is free, but transport is the real cost. Rent a car, join a sensible coast-focused tour or use JR plus bus for one carefully chosen area.
- Uminonakamichi Seaside Park and Marine World: Best for families, cyclists and travelers who want a full outdoor-and-aquarium day. Allow 6–8 hours. Current adult admission is ¥450 for the park and ¥2,500 for Marine World; bicycle rental costs extra and is first come, first served. JR is usually the clearest route from Hakata.
The Most Practical 5-Day Itinerary
Day 1: Hakata Old Town, Kushida Shrine, Canal City and Nakasu
- Suggested start: 1:00 p.m. after dropping luggage at your hotel. Early arrivals can begin around 10:00 a.m., but do not force a full sightseeing day after an overnight flight.
- Order: Gion Station → Tochoji Temple, if interested → Hakata Old Town lanes → Kushida Shrine → Kawabata Shopping Arcade → Canal City → Nakasu riverside → dinner in Nakasu, Tenjin or Hakata.
- Recommended time: Tochoji 30–40 minutes; Hakata Old Town lanes 45–60 minutes; Kushida Shrine 30–45 minutes; Kawabata 30 minutes; Canal City 60–90 minutes; riverside and dinner 1.5–2.5 hours.
- Best transport: Subway to Gion or Kushida Shrine Station, then walk in one direction. Do not take a bus between every stop; the walking links are short enough and bus waiting can erase any saving.
- Lunch or rest: Use Kawabata Shopping Arcade or Canal City for air conditioning, toilets and a predictable range of food. This is more practical than gambling your first meal on a famous restaurant with a long queue.
- What to cut when tired: Skip Tochoji if temples are not a priority, or limit Canal City to one hour. Kushida Shrine and the old-town streets give the day its strongest sense of place.
- Rain plan: Keep Kushida Shrine brief, then spend more time in Kawabata and Canal City. Fukuoka Asian Art Museum near Nakasu-Kawabata is another sensible indoor substitute when open.
- Evening area: Nakasu for atmosphere, Tenjin for the widest restaurant backup choices, or Hakata Station for an easy early night.
- Why this beats the usual influencer route: Many first-day plans bounce from Hakata Station to Ohori Park, back to Canal City and then west again for Fukuoka Tower. This version stays in one walkable historic corridor and protects the weather-dependent western sights for a dedicated day.
Yatai reality check: food stalls are atmospheric, but they are tiny, queues can be slow, opening depends on the operator and weather, and a group may not sit together. Treat yatai as an experience or one round of food, not a guaranteed full dinner. Save a nearby ramen shop, izakaya or department-store restaurant as Plan B.
Day 2: Dazaifu Tenmangu and Kyushu National Museum
- Suggested start: Leave central Fukuoka around 7:30–8:00 a.m. Aim to reach Dazaifu before the late-morning tour groups.
- Order: Dazaifu Station → approach street before it becomes congested → Dazaifu Tenmangu → optional Tenkai Inari or quiet garden paths → Kyushu National Museum at or soon after opening → late lunch near Dazaifu Station → return to Tenjin.
- Recommended time: Shrine and grounds 1.5–2 hours; optional uphill detour 30–45 minutes; museum 1.5–2.5 hours; lunch 45–60 minutes.
- Best transport: From Tenjin, Nishitetsu rail is usually the cleanest choice. From Hakata, the direct bus can be convenient when departure times align, but road traffic makes its arrival less predictable. Travelers prone to motion sickness or anxious about delays should favor rail.
- Lunch or rest: Do not queue at the first photogenic shop on the approach. Walk back toward the station or use a side street after the shrine; popular snack lines generally peak from late morning.
- What to cut when tired: Remove Tenkai Inari and other uphill extras first. Museum-fatigued travelers can shorten the permanent exhibition rather than skipping the shrine’s quieter rear areas.
- Rain plan: Visit the shrine with an umbrella, then give more time to Kyushu National Museum. The museum connection from the shrine side reduces exposure compared with building a second outdoor attraction into the day.
- Evening area: Tenjin, Daimyo or Yakuin. You finish on the Nishitetsu side of the city, so there is no reason to detour through Hakata Station before dinner.
- Why this beats the usual influencer route: The common mistake is adding Yanagawa, Nanzoin, Itoshima or multiple cafes to Dazaifu. That creates a transport day disguised as sightseeing. Dazaifu plus the national museum is already a substantial, coherent half-to-three-quarter day.
Important 2026 correction: older travel posts may still say Dazaifu Tenmangu’s main sanctuary is hidden by a temporary hall during restoration. That information became outdated after the major work was reported complete in May 2026. Because shrine maintenance can still affect access, check the official site before your visit rather than relying on a pre-2026 blog.
Day 3: Ohori Park, Fukuoka Castle, teamLab Forest, Momochi and Fukuoka Tower
- Suggested start: 7:45–8:15 a.m. for cooler temperatures, softer light and fewer joggers around the narrowest waterfront sections.
- Order: Ohori Park → Fukuoka Castle Ruins and Maizuru Park → lunch in Akasaka or Ropponmatsu → timed teamLab Forest session at BOSS E・ZO FUKUOKA → Momochi Seaside Park → Fukuoka Tower before sunset.
- Recommended time: Ohori Park 60–90 minutes; castle and Maizuru Park 60–90 minutes; lunch 60 minutes; teamLab 90–120 minutes; Momochi and tower 2–2.5 hours.
- Best transport: Walk between Ohori Park and the castle area. Use the subway or a taxi toward BOSS E・ZO. From the dome area to Fukuoka Tower, walk only when weather and energy are good; a short taxi is often worth the cost for two or more people.
- Lunch or rest: Akasaka and Ropponmatsu give better flexibility than waiting until the dome complex, where event-day demand can spike. Eat before your timed teamLab entry.
- What to cut when tired: Shorten the full Ohori loop, skip the castle’s more distant edges, or omit teamLab if digital art is not your thing. Do not sacrifice the whole afternoon merely to “complete” every park path.
- Rain plan: Keep the timed teamLab slot, add Fukuoka City Museum if its opening day and exhibitions suit you, then visit Fukuoka Tower for the city view. Move Ohori Park to another dry morning.
- Evening area: Momochi for sunset, then return to Tenjin for dinner. On baseball or concert days, avoid relying on restaurants beside the dome without a reservation.
- Why this beats the usual influencer route: These attractions are all on the western side. Pairing Fukuoka Tower with Dazaifu or Uminonakamichi creates needless cross-city travel. A timed indoor attraction in the middle also gives your legs and the weather a break.
Sunset warning: reaching Fukuoka Tower at the exact sunset time is too late. Allow 45–60 minutes of buffer on weekends, holidays and clear evenings. Advance admission may remove the need to buy at the counter, but everyone still depends on elevator capacity.
Day 4: Itoshima Without the Photo-Spot Marathon
- Suggested start: 8:00 a.m. for a daytime coastal route. For a sunset-focused visit, start later and accept that you will see fewer stops.
- Order by car: Central Fukuoka → Sakurai Shrine → Sakurai Futamigaura → one coastal cafe or lunch stop → one additional area such as Keya or another Genkai-coast viewpoint → return before evening traffic.
- Order without a car: JR to Kyudai-Gakkentoshi Station → Showa Bus toward the Futamigaura area → Sakurai Futamigaura and one nearby meal or cafe → return on a deliberately chosen bus. Do not improvise a five-stop loop after arrival.
- Recommended time: Sakurai Shrine 45–60 minutes; Futamigaura 60–90 minutes; lunch 60–90 minutes; one extra coast area 1.5–2 hours; leave substantial transport buffer.
- Best transport: A rental car is the most flexible option for confident drivers. A coast-focused guided tour can be better for non-drivers. JR plus bus works for one segment, but it is not an efficient way to collect every famous cafe and beach.
- Lunch or rest: Reserve a must-visit restaurant where possible, or choose a flexible cluster with several alternatives. Building the entire day around one viral cafe is risky because queues, parking and sellouts can distort the route.
- What to cut when tired: Cut the farthest “one more photo” stop. Sakurai Futamigaura plus a relaxed lunch is more rewarding than spending the afternoon entering and exiting parking lots.
- Rain plan: Itoshima loses much of its appeal in heavy rain, strong wind or poor visibility. Swap Day 4 with Day 3 or Day 5 when reservations permit. If the day cannot move, choose a leisurely lunch, a craft stop and one safe viewpoint rather than chasing exposed beaches.
- Evening area: Eat near your hotel or in Tenjin after returning. Do not commit to a second long queue after a driving or bus-heavy day.
- Why this beats the usual influencer route: The viral version stacks Futamigaura, Shiraito Falls, Keya, multiple cafes and sometimes attractions outside Itoshima. The roads and bus network do not behave like a metro line. One coast, one meal and one optional add-on is the efficient version.
Public-transport warning: the local operator advises that buses can be delayed by congestion and that passengers may need to wait for the next service when a bus reaches capacity. Screenshot the return timetable, arrive early at the stop and never plan a tight dinner reservation immediately after your expected return.
Day 5: Uminonakamichi Seaside Park and Marine World
- Suggested start: Leave Hakata around 8:00–8:15 a.m. so you can reach the park near opening and secure a rental bicycle before peak family demand.
- Order: JR Hakata → transfer at Kashii → Uminonakamichi Station → park bicycle rental → selected gardens, animal areas or seasonal zones → lunch → Marine World → JR or seasonal ferry route back, depending on operating conditions.
- Recommended time: Park 2.5–4 hours; lunch 45–60 minutes; Marine World 2.5–3.5 hours. Families who read every display should expect a longer aquarium visit.
- Best transport: JR is usually easiest to understand from Hakata, although it requires a transfer. A ferry can be scenic and useful when schedules align, but never assume the last connection will suit your plan without checking the date-specific timetable.
- Lunch or rest: Eat before the aquarium’s busiest midday period, or carry a simple backup snack where park rules allow. The complex is large enough that walking across it just for a specific restaurant wastes time.
- What to cut when tired: Choose the park or Marine World as the headline attraction. Outdoor travelers can skip the aquarium; families on a hot or rainy day can shorten the park and prioritize Marine World.
- Rain plan: Make Marine World the main event and reduce the park to the station-side area, or replace the park entirely with Hakata Station and its indoor shopping and dining zones.
- Evening area: Hakata Station is the practical final-night choice for dinner, souvenir shopping and airport preparation.
- Why this beats the usual influencer route: Uminonakamichi is not a small urban park. Renting a bicycle and choosing two or three zones prevents a long, tiring zigzag. Keeping Marine World beside it is geographically logical; adding Momochi or Dazaifu is not.
Tourist Traps to Avoid & Itinerary Hacks
- Trap: treating “Fukuoka” as one compact neighborhood. Central Fukuoka is manageable; the classic day trips are not. Assign one direction to each day and resist cross-city combinations.
- Trap: returning to Hakata Station between every activity. Hakata is a transport hub, not a compulsory reset button. Finish Dazaifu day in Tenjin, finish Momochi day in Tenjin and use Hakata mainly for airport, JR and eastern excursions.
- Trap: hauling luggage to a day trip. Dazaifu’s approach street, transfers to Uminonakamichi and Itoshima buses are all worse with a large suitcase. Store or deliver luggage before sightseeing.
- Trap: believing every bus shown by a map app is the fastest choice. Fukuoka city buses can be useful, but central road traffic and full vehicles make travel times less reliable at rush hour and on event days. Subway plus a short walk or taxi is often calmer.
- Trap: booking Fukuoka Tower for “sunset” and arriving at sunset. Ticket scanning is not the only bottleneck. Elevator demand can produce a queue in both directions, so arrive early and keep dinner flexible.
- Trap: assuming an e-ticket is automatically a skip-the-line ticket. At teamLab, advance booking protects your time slot; at the tower, an advance ticket does not remove elevator capacity limits. Read what the ticket actually promises.
- Trap: making a yatai your only dinner plan. Small seating capacity, weather and individual stall schedules make this fragile. Choose a backup restaurant within a ten-minute walk.
- Trap: spending half a prime sightseeing day in Canal City. It is useful for rain, food, toilets and shopping, but it is not a substitute for Hakata’s historic streets unless shopping is your main interest.
- Trap: attempting Itoshima by public transport as a hop-on-hop-off route. Select one bus corridor and one fixed return. A tour or car is sensible only when it genuinely reduces transfers and does not combine opposite sides of the region.
- Trap: buying a rail pass because it sounds convenient. A city-centered Fukuoka trip rarely justifies a broad JR Kyushu pass. Compare the price of your actual trips. For central days, an IC card or a subway day pass can be simpler.
- Hack: reserve one weather-swap day. Keep Itoshima movable and place teamLab or Marine World on the wetter day when ticket conditions allow.
- Hack: eat 30–60 minutes off the standard schedule. An 11:15 a.m. lunch or 1:30 p.m. lunch often saves more time than walking to a supposedly “hidden” restaurant.
- Hack: use taxis surgically, not habitually. A short taxi from BOSS E・ZO to Fukuoka Tower, from a subway station to a hotel with luggage, or across an awkward last mile can save energy without destroying the budget.
- Hack: check PayPay Dome events. Baseball games and concerts can change restaurant demand, road congestion and taxi availability around teamLab and Momochi.
- Hack: ignore outdated Dazaifu renovation content. Verify current shrine access instead of planning around old temporary-hall information.
Save Your Legs! The Most Efficient Route
The core of this route is geographic discipline. Day 1 stays in the Hakata Old Town–Kawabata–Nakasu corridor. Day 2 goes south to Dazaifu. Day 3 moves west through Ohori, Maizuru, the dome area and Momochi. Day 4 continues farther west to Itoshima. Day 5 goes east to Uminonakamichi. You are not trying to maximize the number of attractions; you are trying to minimize backtracking, uncertain transfers and unnecessary walking.
Walk these links: Gion to Hakata Old Town, Kushida Shrine, Kawabata and Canal City; Ohori Park to Maizuru Park and Fukuoka Castle; Dazaifu Station to the shrine and museum approach. These are logical continuous walks with something to see along the way. Do not turn every 700-meter connection into a bus wait.
Use the subway for predictable central movement: airport to Hakata or Tenjin, Hakata to Gion/Kushida Shrine, Tenjin to Ohori/Akasaka and central returns at rush hour. The airport-to-Hakata ride is exceptionally short, which is why an airport hotel is rarely necessary solely for transport convenience.
Use JR where it is structurally better: Hakata to the Uminonakamichi route via Kashii, and central Fukuoka to Kyudai-Gakkentoshi before connecting to an Itoshima bus. Use Nishitetsu rail for Dazaifu when starting from Tenjin. The direct Hakata–Dazaifu bus is convenient only when its departure and traffic conditions fit your day.
Use city buses selectively: they are useful for last-mile movement around Momochi and parts of western Fukuoka, but they are most vulnerable to road congestion and crowding during commuter periods, weekends and PayPay Dome events. When the route involves a subway plus a 10–15 minute walk, that is often more predictable than a bus through traffic.
Take a short taxi when the walking penalty is larger than the fare: two to four travelers can often justify a taxi between BOSS E・ZO and Fukuoka Tower, from a station to a hotel while carrying large bags, or for an awkward final kilometer in heat, rain or after dark. This is not luxury spending; it can prevent the group from losing 30–45 minutes and arriving exhausted.
Do not return to Hakata by default: after Dazaifu, stay on the Nishitetsu side and enjoy Tenjin, Daimyo or Yakuin. After Momochi, return to Tenjin for dinner. Use Hakata as your eastern transport base on Day 5 and for the airport, not as the center of every evening.
Best accommodation zones: Gion or Nakasu-Kawabata offers the best balance for Old Town, Hakata and Tenjin access. Hakata Station is best for an early flight, JR day trips and travelers who prioritize elevators and luggage logistics. Tenjin is best for Nishitetsu access to Dazaifu, dining and nightlife. A cheaper hotel far outside these areas can cost more in daily transfers and lost energy.
Large-luggage strategy: leave bags with your hotel whenever possible. Hakata Station has lockers and staffed storage options, although large lockers can fill at peak arrival times. Fukuoka Airport provides lockers and luggage services; eligible domestic-terminal users can also check the current CARGO PASS same-day hotel-delivery conditions. At the international terminal, check the current Yamato counter services and hours. Never assume every hotel or bag size qualifies—confirm the participating hotel, acceptance cutoff and delivery window before handing over anything essential.
Subway pass reality: the current Fukuoka City Subway one-day pass is useful only on a subway-heavy day. Count your planned rides before buying. Day 1 or Day 3 may qualify depending on your hotel and taxi use; Dazaifu and Uminonakamichi rely on other operators, so the pass does not magically cover the whole itinerary.
Ticket Tips & Skip-the-Line Hacks
Strong recommendation: buy a timed teamLab Forest ticket online before your trip, especially for weekends, holidays, school breaks and rainy days. Same-day tickets may be sold only when a session has not sold out, and the official rules do not generally allow casual date changes or cancellations. Choose the slot after planning lunch and transport, not before.
- Advance e-ticket strongly recommended — teamLab Forest:
timed admission controls availability, and a sellout can eliminate same-day entry. A QR voucher can remove the ticket-counter step, but security, entry control and internal crowd management still apply.
Check teamLab Forest tickets on Klook
or
check teamLab Forest tickets on KKday. - Advance ticket useful, but not a true fast pass — Fukuoka Tower:
online admission can reduce ticket-purchase friction. It cannot skip the elevator queue, and the tower may stop admitting visitors earlier than the stated last-entry time when crowded.
Check Fukuoka Tower tickets on Klook. - Digital ticket available but usually not essential — Marine World:
an official digital ticket can be convenient, particularly on busy family days. Some limited experiences, feeding sessions or seasonal programs may have separate release rules, so read the individual event page rather than assuming aquarium admission includes everything.
Check Marine World’s official digital-ticket page. - Usually purchased on site — Uminonakamichi Seaside Park:
park admission is straightforward, while bicycle rental is first come, first served and generally cannot be reserved. Arriving near opening matters more than buying an elaborate package.
Check official park hours and fees. - Free entry — Dazaifu Tenmangu, Kushida Shrine, Hakata Old Town streets, Ohori Park, Fukuoka Castle outdoor areas, Momochi beach and Sakurai Futamigaura:
do not pay a reseller for “entry” to free public or religious sites. Charges may apply to museums, gardens, parking, transport or optional experiences. - On-site or official online options — Kyushu National Museum:
the Cultural Exchange Exhibition has a regular paid admission. Special exhibitions have separate prices and may offer official advance sales through named vendors. Mondays and exhibition-change periods can affect opening, so confirm the exact date.
Check the Kyushu National Museum official calendar. - No advance ticket needed — ordinary shrine and Old Town visits:
Dazaifu Tenmangu, Kushida Shrine and neighborhood walks do not become better because you bought a third-party “pass.” Spend that money on the right train, a locker or a strategic taxi. - Reserve only when the experience truly requires it:
popular kimono rentals, tea experiences, hands-on workshops, seasonal illumination events and limited aquarium programs can require a time slot. These are separate products; never assume they are included with general admission. - Itoshima tour option for non-drivers:
inspect every stop before buying. Choose a route concentrated in Itoshima and reject products that combine distant attractions merely to increase the pin count.
View a current Itoshima day-tour option on Klook.
Confirm the current meeting point, language, minimum numbers and cancellation terms before payment.
Affiliate disclosure: the Klook and KKday links above contain affiliate tracking. The price should not increase because of the tracking code, but availability, currency, cancellation conditions and inclusions can differ by market. Compare the official price and the final checkout total before buying.
Tried & Tested: My Honest Review
📍 Stop 1: Hakata Old Town, Kushida Shrine and Kawabata
Features: Free entry · Local history · Walkable route · Best on arrival day · Minimal transport
Popular YouTube preview — live URL checked August 5, 2026:
https://www.youtube.com/watch?v=I9yp_xFzuOE
Honest take: This is the best introduction to Fukuoka because it explains the city before the shopping malls and day trips take over. The attraction is the sequence, not one blockbuster monument. Walk slowly enough to notice temple gates, machiya details, festival culture and the transition into Kawabata.
✅ What Other Travelers Say: Visitors commonly appreciate that the area feels more local and manageable than Japan’s headline historic districts. Kushida Shrine is easy to include without a major time or money commitment.
⚠️ The Catch (Things to Keep in Mind): Travelers expecting Kyoto-scale preserved streets may be underwhelmed. Modern buildings interrupt the historic fabric, and some temple interiors have access restrictions. Come for context and atmosphere, not a fantasy of an untouched old town.
📍 Stop 2: Canal City, Nakasu Riverside and the Yatai Experience
Features: Rain-friendly · Shopping · Night atmosphere · Food variety · Easy backup plan
Honest take: Canal City is useful rather than essential. It earns its place as an arrival-day buffer, rainy-day shelter and reliable meal stop. Nakasu looks best after dark, while yatai are worth trying when you treat them as compact social dining rather than a guaranteed gourmet pilgrimage.
✅ What Other Travelers Say: Many visitors enjoy the concentration of shopping, food and evening lights, and the stalls can create easy conversation with staff or neighboring diners.
⚠️ The Catch (Things to Keep in Mind): Canal City can consume hours without delivering much local character. Yatai seating is cramped, queues can move slowly, prices are not always obvious from a distance, and some travelers dislike smoke, cold, heat or limited menus. Read the menu before sitting and keep a restaurant backup.
📍 Stop 3: Dazaifu Tenmangu and Kyushu National Museum
Features: Major shrine · National museum · Easy half-day · Seasonal scenery · Strong history pairing
Popular YouTube preview — live URL checked August 5, 2026:
https://www.youtube.com/watch?v=iI2yglaBmjw
Honest take: Dazaifu is worth the trip, but the famous approach street can feel like a snack-and-souvenir funnel by late morning. Arrive early for the shrine, then use the museum to add historical depth and escape midday weather. The pair is much stronger than either one rushed alone.
✅ What Other Travelers Say: Visitors praise the landscaped grounds, seasonal plum blossoms, distinctive architecture and the museum building. The route is approachable for travelers who do not want a complicated rural day trip.
⚠️ The Catch (Things to Keep in Mind): School groups and tour buses can change the atmosphere quickly. The museum is large enough to cause fatigue, and it is commonly closed on Mondays or during changeover periods. Older articles about the temporary main hall may no longer reflect 2026 conditions.
📍 Stop 4: Ohori Park, Maizuru Park and Fukuoka Castle Ruins
Features: Free outdoor space · Morning walk · Seasonal flowers · Low-cost day · Flexible duration
Popular YouTube preview — live URL checked August 5, 2026:
https://www.youtube.com/watch?v=pCDmTfe0ii4
Honest take: Ohori is a reset button, not a checklist attraction. Pairing it with the castle ruins gives the morning more shape, but the “castle” is mainly foundations, walls, gates and viewpoints. Travelers who expect a reconstructed keep may feel misled by the name.
✅ What Other Travelers Say: The lake path, bridges and open space are repeatedly described as relaxing, especially in spring and during cooler mornings. It is one of the easiest places to slow the pace without spending money.
⚠️ The Catch (Things to Keep in Mind): A full loop plus every castle path can become repetitive in summer heat. Seasonal events can make Maizuru Park busy, while poor weather removes much of the appeal. Choose a focused route instead of covering every edge.
📍 Stop 5: teamLab Forest at BOSS E・ZO FUKUOKA
Features: Timed ticket · Digital art · Rainy-day option · Family-friendly · Interactive movement
Honest take: teamLab Forest is one of the few attractions in this itinerary where pre-booking can materially protect the day. It is visually engaging and weather-proof, but it is not a quiet fine-art museum. The experience depends on movement, projections, dark spaces and other visitors interacting around you.
✅ What Other Travelers Say: Families and first-time teamLab visitors often enjoy the responsive rooms and photo opportunities. Direct QR entry is frequently valued when sessions are busy.
⚠️ The Catch (Things to Keep in Mind): Crowding can make photos and interaction less immersive. Strollers are not permitted inside, re-entry is not allowed, and footwear such as heels or unstable sandals may limit participation in some areas. Travelers sensitive to darkness, motion or visual stimulation should review accessibility notes first.
📍 Stop 6: Momochi Seaside Park and Fukuoka Tower
Features: Sunset view · Urban beach · Skyline photography · Paid observatory · Easy evening finish
Popular YouTube preview — live URL checked August 5, 2026:
https://www.youtube.com/watch?v=WFGdCBh4pAQ
Honest take: The tower is most worthwhile when you care about changing light, coastal geography and city views. In flat gray weather, the value drops. Momochi itself is pleasant but highly planned and modern; it is not a wild beach escape.
✅ What Other Travelers Say: Many enjoy the broad panorama and the transition from daylight to city lights. Combining the tower with the beach and teamLab makes the admission and travel feel more purposeful.
⚠️ The Catch (Things to Keep in Mind): Sunset is exactly when elevator demand peaks. Some visitors report substantial waits to go up and back down. An online ticket does not create a private elevator, so do not book a tight dinner or airport transfer afterward.
📍 Stop 7: Itoshima Coast and Sakurai Futamigaura
Features: Coastal scenery · Best by car · Cafe culture · Photography · Weather-dependent
Honest take: Itoshima is the itinerary’s most beautiful potential day and its easiest logistical failure. The coast rewards unhurried movement. It punishes travelers who mistake a list of Instagram pins for a connected route.
✅ What Other Travelers Say: Visitors value the sea views, cafes, sunsets and contrast with central Fukuoka. Drivers often describe the journey itself as part of the appeal.
⚠️ The Catch (Things to Keep in Mind): Without a car, waiting and timetable anxiety can dominate the day. Parking and cafe queues rise on sunny weekends, while rain or strong wind can flatten the experience. Avoid a tour that mixes Itoshima with distant attractions in the opposite direction.
📍 Stop 8: Uminonakamichi Seaside Park and Marine World
Features: Full-day complex · Cycling · Aquarium · Family-friendly · Seasonal flowers
Honest take: This pair works because the attractions share the same eastern peninsula, not because every traveler needs both. The park is enormous, so a bicycle and a short priority list are more valuable than a heroic walking plan.
✅ What Other Travelers Say: Families appreciate the combination of open space, seasonal landscapes, animals and a substantial aquarium. Cycling is repeatedly described as the most enjoyable way to understand the park’s scale.
⚠️ The Catch (Things to Keep in Mind): Bike rental can sell out during popular periods and is generally not reservable. Trying to cover every park zone before a complete aquarium visit can exhaust children and adults. In heavy rain, prioritize Marine World and accept that the outdoor half is compromised.
Video note: the YouTube pages above were reachable when checked on August 5, 2026. WordPress can auto-embed a plain YouTube URL only when the video owner and platform still permit embedding; creators can later change availability or embedding settings. Recheck before publication.
Key FAQs
What is the best Fukuoka 5-day itinerary for first-time visitors without a car?
Spend Day 1 in Hakata Old Town and Nakasu, Day 2 in Dazaifu, Day 3 around Ohori–Momochi, Day 4 on one carefully selected Itoshima bus corridor or a coast-focused guided tour, and Day 5 at Uminonakamichi and Marine World. The crucial adjustment is Itoshima: without a car, reduce the number of stops rather than copying a driving itinerary.
Is five days in Fukuoka too many?
Five days is appropriate when “Fukuoka” includes Dazaifu, Itoshima and Uminonakamichi. It may feel long if you stay entirely between Hakata and Tenjin. Travelers focused only on food and central nightlife can use three days; families, slow travelers and first-time visitors who want two regional day trips will use five comfortably.
Where should a first-time visitor stay in Fukuoka to reduce transport time?
Choose Gion or Nakasu-Kawabata for the best overall balance, Hakata Station for airport and JR convenience, or Tenjin for dining and Nishitetsu access to Dazaifu. Avoid choosing a remote hotel solely for a small nightly saving when it adds a transfer at the start and end of every day.
Final Verdict and Your Next Step
The smartest first-time Fukuoka trip is not a race from shrine to beach to aquarium. It is five directional days with one clear purpose each: understand Hakata, visit Dazaifu properly, connect Ohori with Momochi, give Itoshima enough breathing room and treat Uminonakamichi as the large destination it is.
Before booking anything, lock in your hotel zone and decide whether Itoshima will be a car, tour or one-corridor public-transport day. Then reserve the one ticket most likely to disrupt the route if it sells out: teamLab Forest on Klook or teamLab Forest on KKday. For a clear-weather sunset, you can also compare the Fukuoka Tower ticket on Klook, remembering that it does not bypass the elevator queue.
Finally, save offline copies of the Itoshima return timetable, your timed-ticket QR codes and your hotel address in Japanese. Keep Day 4 movable when possible, use luggage storage instead of sightseeing with suitcases, and spend money on one strategic taxi before you spend it on a pass you do not need. That is how this Fukuoka 5-day itinerary saves time, money and—most importantly—your legs.