
💡 Key Takeaways
- Do not squeeze Hiroshima Peace Memorial Park and a full Miyajima visit into one day. It is technically possible, but it turns two meaningful places into a transport exercise.
- Give Miyajima its own day, arrive before the late-morning tour groups, and check both the tide table and ropeway operating notice before leaving your hotel.
- Book the Hiroshima Peace Memorial Museum online for an early or late reserved slot. Midday entry may be available, but the galleries can become uncomfortably crowded.
- Hiroshima Castle’s main keep closed to visitors on March 22, 2026. The grounds and Ninomaru remain worthwhile, but ignore outdated itineraries that still sell the keep as a ticketed highlight.
- Stay in one Hiroshima hotel for the whole trip. Moving luggage to Miyajima for a single night only makes sense when the overnight island atmosphere is the main purpose of your visit.
A good 3-day Hiroshima itinerary is not a checklist of every attraction in Hiroshima Prefecture. The first-time visitor’s biggest mistake is assuming that Hiroshima city, Miyajima, Onomichi, Rabbit Island and Iwakuni are all “near Hiroshima” and can therefore be mixed freely. They cannot. Ferries, local trains, fixed closing times, mountain weather and emotional fatigue at the Peace Memorial Museum make badly planned days unravel quickly. The route below keeps Hiroshima city and Miyajima as the main story, uses one hotel base, puts the hardest walking on Day 2, and leaves Day 3 flexible enough for a comfortable departure.
Editorial note: Opening hours, fares and booking rules were checked against official or current operator information on August 5, 2026. Always recheck the linked official pages before travel. YouTube links were live when checked, but an uploader can change regional or embedding permissions later.
The 1-Min Cheat Sheet
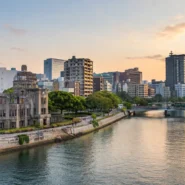
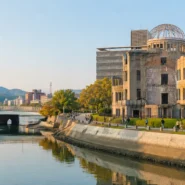
- Hiroshima Peace Memorial Museum and Peace Memorial Park — Best for first-time visitors, history-focused travelers and anyone prepared for a serious, emotionally demanding experience. Allow 2.5–3.5 hours for the museum, park monuments and Atomic Bomb Dome. The park and dome are free; the museum is inexpensive, currently ¥200 for adults. Use Genbaku Dome-mae or Hondori streetcar stops, or walk from central Kamiyacho. Reserve an online museum slot, especially for the first hour, the final reserved period or designated peak dates. The best time is 7:30–10:30 or late afternoon. The catch: the permanent exhibition can bottleneck badly around midday, and this is not a place to rush before a ferry.
- Hiroshima Orizuru Tower and Hondori — Best for photographers, families, rooftop-view fans and travelers who need a lighter experience after the museum. Allow 1–2 hours for the tower and another 1–2 hours for Hondori, cafes or an early dinner. Orizuru Tower is paid; Hondori is free. Genbaku Dome-mae is the closest streetcar stop. Advance purchase is optional, and some third-party vouchers require exchange at the first-floor counter rather than direct gate scanning. Visit late morning after Peace Park or near sunset if operating hours allow. The catch: admission is relatively expensive for a viewpoint, and it is not a true 360-degree outdoor deck.
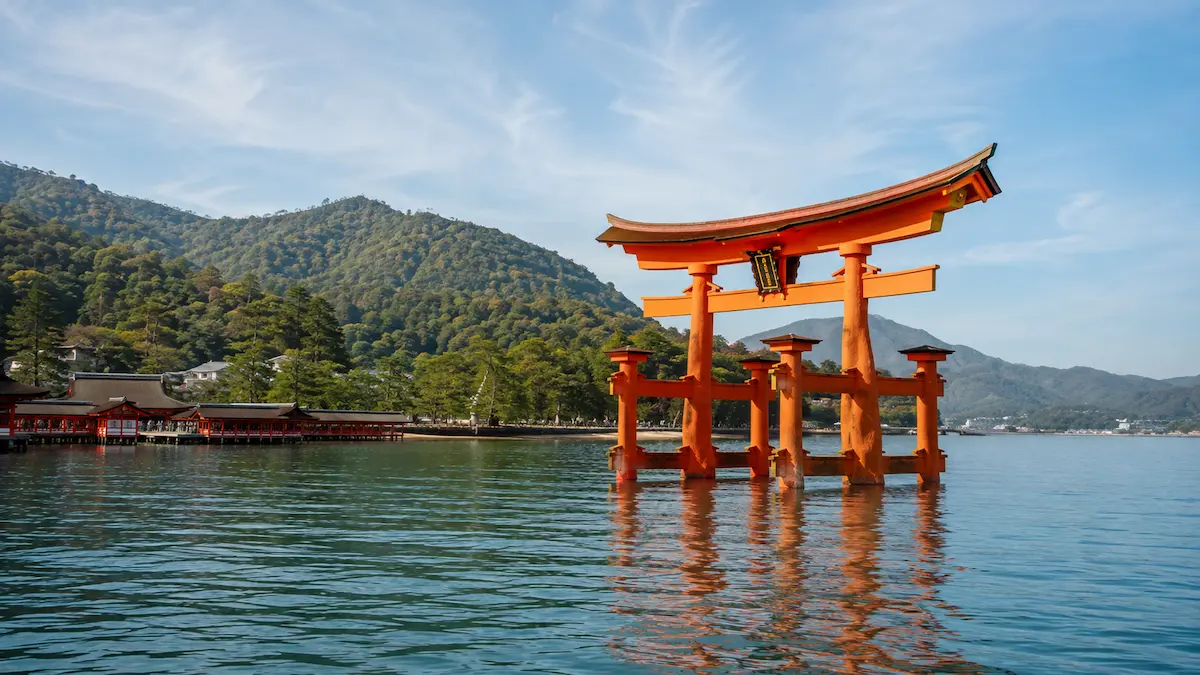
- Itsukushima Shrine and the Great Torii, Miyajima — Best for almost every first-time traveler, cultural travelers and photographers. Allow 1.5–2 hours for the shrine, waterfront and torii views, or most of a day when combined with the mountain. Shrine admission is currently ¥300; the island itself is free, while ferry fare and the Miyajima visitor tax are separate. Take the JR Sanyo Line to Miyajimaguchi and then a ferry, or use Hiroden when time matters less than cost. No shrine reservation is normally needed. Arrive around 8:00–9:00, then revisit the waterfront later if the tide changes. The catch: the narrow approach and Omotesando area become heavily congested from late morning.
- Daisho-in Temple and Mount Misen — Best for hikers, temple lovers, repeat Japan visitors and travelers who want more than the torii photo. Allow 1–1.5 hours for Daisho-in, roughly 1 hour for a ropeway round trip without the summit, or 2–3 hours if walking from Shishiiwa Station to Mount Misen’s summit and back. Daisho-in is free; the ropeway is currently ¥2,000 return for adults. Walk from Itsukushima Shrine toward Daisho-in and Momijidani Park; a limited free shuttle may operate to the ropeway base. Ropeway boarding reservations are required on designated peak dates, not every day. Aim for a pre-noon ascent. The catch: the ropeway does not take you to the summit, and the final section has steep, uneven steps.
- Shukkeien Garden and Hiroshima Castle Grounds — Best for garden lovers, travelers interested in Hiroshima’s reconstruction and anyone needing a low-stress final day near Hiroshima Station. Allow 1–1.5 hours for Shukkeien and 1–1.5 hours for the castle grounds, Ninomaru and nearby facilities. Shukkeien is currently ¥350; the castle park and Ninomaru are free. Use Shukkeien-mae tram stop or walk from Hiroshima Station; continue northwest to the castle. No reservation is usually needed. Start at Shukkeien when it opens. The catch: Hiroshima Castle’s main keep is no longer open, so old photos and outdated ticket pages can create false expectations.
Tourist Traps to Avoid & Itinerary Hacks
- Trap: “Hiroshima and Miyajima in one day is the classic route.” It is a classic day tour because tour companies can bus people between headline sights, not because it is the best independent itinerary. The museum deserves time and emotional space; Miyajima deserves flexibility for tide, weather and the ropeway. Hack: keep Peace Park on Day 1 and Miyajima on Day 2.
- Trap: arriving on Miyajima at noon. This places you on the ferry, shrine boardwalk, shopping street and ropeway during the same crowd wave. Hack: leave Hiroshima around 7:00–7:20, visit the shrine first, and eat before 11:30 or after 13:30.
- Trap: planning the torii gate only around high tide. High tide creates the floating effect, but a low-tide window lets you walk closer to the gate. The “best” tide depends on the photograph or experience you want. Hack: use the official Miyajima tide information, then build the mountain and lunch around it rather than abandoning the whole day when the tide is not perfect.
- Trap: assuming the ropeway eliminates hiking. The ropeway ends at Shishiiwa Station, not Mount Misen’s summit. The summit return walk can take around an hour and includes uneven stone steps, exposed sections and heat. Hack: choose one of three honest versions: viewpoint only, summit hike, or no mountain at all.
- Trap: putting Okunoshima, Onomichi or Iwakuni after Miyajima. These places point in different directions and depend on local connections. “It looks close on the map” is not a transport plan. Hack: add one as a separate fourth day, or replace Day 3 rather than stacking it on top.
- Trap: buying a rail pass because Hiroshima has trams and a ferry. A national or regional JR pass is not automatically good value for three days within Hiroshima city and Miyajima. Hack: calculate your long-distance Shinkansen legs first. Pay-as-you-go IC travel is usually simpler for local movements; a Kansai–Hiroshima pass can make sense when the same five-day window includes Osaka or Kyoto, Hiroshima and additional JR trips.
- Trap: following pre-2026 Hiroshima Castle guides. The main keep closed on March 22, 2026. Hack: visit the grounds and Ninomaru for context, then spend the time you saved at Shukkeien, the Hiroshima Museum of Art or a long lunch.
- Trap: dragging luggage to Miyajima. Station stairs, ferry crowds, deer, stone paths and hotel check-in times make large bags a burden. Hack: leave luggage at Hiroshima Station, your hotel, Miyajimaguchi or Miyajima Passenger Terminal. Hiroshima’s official tourism site lists storage and city-hotel delivery options.
The Perfect 3-Day Hiroshima Itinerary at a Glance
Day 1: Peace Memorial Park, the Atomic Bomb Dome and Downtown Hiroshima
Geographic theme: central Hiroshima’s riverfront and downtown core. This ordering is more efficient than starting at Hiroshima Castle, crossing downtown to the museum, then returning to Hondori. Everything after the museum flows north and east on foot, with no reason to re-board transport until dinner or your hotel.
- Suggested start: 7:20, with a pre-booked 7:30 museum entry where available. A late reserved entry can also work, but the early version protects the rest of the day from queue delays.
- Main order: Hiroshima Peace Memorial Museum → Memorial Cenotaph and Peace Flame → Children’s Peace Monument → Atomic Bomb Dome → Orizuru Tower → Hondori and downtown food streets.
- Transport between stops: walk. From Hiroshima Station, use a streetcar or sightseeing loop bus to the Peace Park area, then stay on foot.
- Walking and difficulty: around 6–8 km, mostly flat and easy. The real fatigue is emotional rather than physical, so do not schedule a rushed attraction immediately after the museum.
- Lunch strategy: avoid the noon crush at the most famous okonomiyaki buildings. Eat around 11:30 after the tower, or take a cafe break and have lunch after 13:30. A single-counter neighborhood restaurant is often calmer than joining a long queue simply because it appears in every guide.
- Easiest stop to cut: Orizuru Tower. The view is good and the indoor experience is polished, but it is the most expensive optional stop of the day.
- Rain or low-energy alternative: keep the museum, National Peace Memorial Hall and dome, then replace extended riverfront walking with Orizuru Tower, a cafe and Hondori’s covered arcade.
Day 2: Miyajima, Itsukushima Shrine, Daisho-in and Mount Misen
Geographic theme: one island, one direction and one full day. This is deliberately separated from Peace Park because the ferry transfer, tides, mountain conditions and lunch queues create enough variables without adding a timed city museum.
- Suggested start: leave Hiroshima Station around 7:00–7:20. The JR train to Miyajimaguchi is much faster than riding the streetcar all the way when an early arrival matters.
- Main order: ferry to Miyajima → Itsukushima Shrine and Great Torii viewpoints → Daisho-in → Momijidani Park → Miyajima Ropeway and optional Mount Misen summit → late lunch → Omotesando shopping street → second torii view if the tide has changed → ferry back.
- Transport between stops: JR train, ferry and walking. Use the ropeway shuttle only when it aligns with your timing; waiting for it can take longer than walking for fit travelers.
- Walking and difficulty: 10–14 km on the summit version, with a moderate-to-hard rating. Without the summit, expect 7–10 km and a moderate day. Daisho-in has many stairs, and the mountain route is not stroller-friendly.
- Lunch strategy: eat an early anago-meshi or oyster lunch before 11:30, or wait until roughly 13:30–14:00. Keep snacks sealed: Miyajima’s deer can be persistent around food and paper.
- Easiest stop to cut: the Mount Misen summit. Keep the shrine and Daisho-in; use the Shishiiwa viewpoint or skip the ropeway entirely if weather, queues or legs are working against you.
- Rain or low-energy alternative: Itsukushima Shrine → Daisho-in’s lower areas → Miyajima History and Folklore Museum or Miyajima Public Aquarium → Omotesando. Skip the ropeway in strong wind, thunderstorms or poor visibility.
Day 3: Shukkeien, Hiroshima Castle Grounds and a Departure-Friendly Finish
Geographic theme: the station side of central Hiroshima and the city’s reconstruction story. Many online routes waste Day 3 by sending travelers to a distant prefectural day trip before a train or flight. This version stays flexible, stores luggage easily and finishes near the main transport hub.
- Suggested start: 9:00 at Shukkeien Garden. Leave bags at your hotel or Hiroshima Station before sightseeing.
- Main order: Shukkeien Garden → optional Hiroshima Prefectural Art Museum → Hiroshima Castle grounds and Ninomaru → Sannomaru area or Hiroshima Museum of Art → lunch in Kamiyacho/Hatchobori → Hiroshima Station for souvenirs, ekie dining and departure.
- Transport between stops: walk from Shukkeien toward the castle if the weather is comfortable; otherwise use a short taxi or local transit. Continue by bus, tram or taxi to Hiroshima Station depending on luggage and departure time.
- Walking and difficulty: around 5–7 km, easy to moderate and mostly flat. Garden paths can be uneven and slick in rain.
- Lunch strategy: make this the day for a proper, unhurried lunch. Downtown restaurants are easier before noon; Hiroshima Station is convenient but busiest around train departure peaks.
- Easiest stop to cut: the Sannomaru or museum add-on. Shukkeien plus a short castle-grounds visit is enough for an early departure.
- Rain or low-energy alternative: Hiroshima Prefectural Art Museum, Hiroshima Museum of Art, a missed Orizuru Tower visit, or a long lunch near the station. Car enthusiasts can replace most of Day 3 with a pre-reserved Mazda Museum tour, but should not add it to the full city route.
Save Your Legs! The Most Efficient Route
The route works because each day has one transport logic. Day 1 is a compact walking line through the Peace Park and downtown. Day 2 is a single out-and-back rail-and-ferry journey. Day 3 stays on the Hiroshima Station side of the center, where luggage and onward transport are easiest. There is no repeated Hiroshima Station–Peace Park–castle–station zigzag, and no ferry day tied to a museum reservation.
What belongs together: the museum, park monuments, Atomic Bomb Dome, Orizuru Tower and Hondori sit in one walkable central cluster. Itsukushima Shrine, Daisho-in, Momijidani and Mount Misen share one island and should be treated as a single day. Shukkeien and Hiroshima Castle are close enough to pair, particularly now that the closed main keep no longer requires a long interior visit.
What looks close but should not be forced into the same time block: Peace Park and Miyajima are connected by direct sightseeing boats and public transport, but “connected” does not mean relaxed. Hiroshima Station and the Peace Park are also farther apart than many first-time visitors expect when carrying bags. Okunoshima is in eastern Hiroshima Prefecture and depends on a local train plus ferry; Iwakuni lies west in Yamaguchi Prefecture; Onomichi lies east. Any one can replace Day 3, but none is a sensible extra after a full Miyajima mountain day.
Best transport choices: use JR from Hiroshima Station to Miyajimaguchi when speed matters. The streetcar is atmospheric and useful inside the city, but Route 2 to Hiroden-miyajima-guchi is much slower than JR. Inside central Hiroshima, walking plus occasional streetcar rides is usually simpler than chasing a pass. Buses can be efficient, but street names and boarding points are less intuitive for a first visit. A short taxi is a smart purchase when two or more travelers are tired, it is raining, or luggage is involved; saving thirty minutes and a confusing transfer can be worth more than squeezing value from a day pass.
Difficult surfaces: central Hiroshima is mostly flat. Miyajima is not. Daisho-in has long stairways, Momijidani rises gradually, and the Mount Misen summit approach includes rough stone steps and slopes. Wet leaves and stone can be slippery. The shrine boardwalk is easier, but thresholds and crowded sections can slow wheelchairs and strollers. Large suitcases are particularly awkward on the ferry approach, narrow shopping street and temple routes.
Where to stay: Hiroshima Station is the best practical base for Shinkansen arrivals, the airport limousine bus, an early JR start to Miyajima and luggage storage. Its weakness is that most evening sightseeing requires a tram or taxi. Kamiyacho, Hatchobori or Hondori offers the best overall balance: walkable dining, Peace Park access and the Hiroshima Bus Center, but no mainline railway at the door. Peace Park or Nakajima accommodations are calm and ideal for an early museum visit, although late-night food choices can feel thinner and the station transfer is less direct. For most first-timers, I would choose Hiroshima Station for a rail-heavy Japan trip and Kamiyacho/Hondori for a city-focused stay.
Luggage plan: on arrival, leave bags at your hotel even before check-in, use Hiroshima Station lockers or a staffed storage counter, or arrange same-day delivery to participating Hiroshima city hotels. On departure day, store bags before Shukkeien. Do not carry a full-size suitcase to Miyajima unless you are actually staying overnight. The official Hiroshima tourism luggage page lists storage and delivery information, including Miyajima-area options. For Hiroshima Airport, the limousine bus from Hiroshima Station takes roughly 50 minutes in normal conditions, but road traffic means you should keep a buffer.
Ticket Tips & Skip-the-Line Hacks
Check official information shortly before departure. Seasonal hours, year-end closures, maintenance and weather suspensions matter more here than a supposed “secret entrance.” Use the Hiroshima Peace Memorial Museum, Itsukushima Shrine, Miyajima Ropeway, JR West Miyajima Ferry and Shukkeien sites as the final authority.
Hiroshima Peace Memorial Museum: this is the ticket to buy online. Current web tickets use a QR code, and reserved-only early or late periods can provide a calmer visit. During ordinary daytime hours an advance ticket may not remove every queue, because security, capacity controls and gallery congestion remain. On specially designated peak dates, reservation rules can be stricter. There is no honest, all-day “walk past everyone” product.
Check Hiroshima Peace Memorial Museum e-ticket availability on Klook — affiliate link. Confirm the selected date, entry period and voucher instructions before payment.
Itsukushima Shrine: on-site purchase is normally enough. The shrine opens early, the ticket is inexpensive, and no widely available third-party product creates a genuine skip-the-line lane. Arriving before the main crowd is more effective than buying an inflated tour bundle.
Miyajima Ropeway: check the operating notice before leaving Hiroshima. Advance boarding reservations are needed on specific high-demand dates listed by the operator; on other days the site may explicitly say no reservation is required. A reservation controls the uphill boarding time but does not remove the walk to Momijidani Station, weather stoppages or the hike beyond Shishiiwa. Tickets are available on site, and an online booking is useful mainly when your date is designated or your schedule is tight.
Orizuru Tower: advance purchase can save decision time and sometimes money, but read redemption instructions. The currently listed Klook voucher requires exchange at the first-floor reception counter, so this is not direct QR gate entry and not a true skip-the-line promise.
Check Orizuru Tower admission on Klook — affiliate link.
Shukkeien and Hiroshima Castle: Shukkeien’s inexpensive ticket is easy to buy on site; an e-ticket is convenience, not necessity. Hiroshima Castle’s main keep is closed, while the park and Ninomaru are free. Do not buy any listing that appears to promise access to the old keep without carefully checking the current product description.
Transport passes: a Hiroshima streetcar or tourist pass can be convenient if you will make several paid rides, but this itinerary’s city days are walkable. A JR Kansai–Hiroshima Area Pass is potentially valuable only when long-distance Kansai–Hiroshima travel and additional covered JR journeys fall within its five consecutive days. It is overkill for Hiroshima city plus Miyajima alone.
Tried & Tested: My Honest Review
📍 Stop 1: Hiroshima Peace Memorial Museum and Peace Memorial Park
Tags: Essential first visit · Powerful history · Flat walking · Book ahead
My honest review: This is the non-negotiable stop, but it should not be treated like a box to tick between breakfast and a ferry. The museum’s narrow sequence can feel oppressive when crowded, and the material requires concentration. Booking the first reserved period gives you the best chance of reading rather than shuffling. Afterward, walk through the park slowly and let the city outside the exhibition reconnect the history to a living place.
✅ What Other Travelers Say: Travelers consistently describe the museum as moving, important and worth more time than expected. Many also report that an audio guide or quiet early slot makes the visit easier to absorb.
⚠️ The Catch (Things to Keep in Mind): The exhibits include personal belongings, photographs and accounts of mass suffering. Children and sensitive visitors may need preparation. A prepaid ticket does not guarantee empty galleries, and midday congestion can reduce the quality of the experience.
📍 Stop 2: Hiroshima Orizuru Tower, Hondori and Okonomiyaki
Tags: Rooftop view · Family-friendly · Covered shopping · Optional splurge
My honest review: Orizuru Tower works best as a change of emotional pace after Peace Park, not as an independent reason to cross the city. The elevated view helps explain the relationship between the dome, rivers and rebuilt city. Hondori then gives you shade, shops and food without another transfer. I would pay for the tower on a clear day, with children, or when I wanted the origami experience; budget travelers can skip it and still have a complete Day 1.
✅ What Other Travelers Say: Visitors often praise the relaxed rooftop atmosphere, city view and paper-crane activity. Families like the interactive elements, while photographers appreciate seeing the Atomic Bomb Dome from above.
⚠️ The Catch (Things to Keep in Mind): The admission price is high compared with Hiroshima’s inexpensive museums and gardens. The viewpoint is not a fully open 360-degree deck, and third-party tickets may still require counter exchange. Okonomimura and other famous food buildings can have long queues; popularity is not proof that every stall is better than a quieter neighborhood counter.
📍 Stop 3: Itsukushima Shrine and the Great Torii
Tags: UNESCO icon · Early-morning priority · Tide-dependent views · Easy main route
My honest review: The shrine is famous for good reason, but the quality of the visit changes dramatically by hour. Before the group-tour wave, the waterfront feels spacious and the shrine corridors move naturally. Around midday, the same narrow route can become a slow photo queue. Do not postpone the shrine until after lunch just because the tide is slightly better; visit early, then return to the shore later if the tide timing matters.
✅ What Other Travelers Say: Travelers love seeing both high- and low-tide versions, the short ferry approach and the contrast between the vermilion shrine and wooded hills. Early arrivals repeatedly mention a calmer atmosphere.
⚠️ The Catch (Things to Keep in Mind): The “floating” look depends on tide level, and the island is not empty simply because it is a weekday. The visitor tax is charged when entering by boat. Deer can take food, maps and loose paper; they are wild animals, not props.
📍 Stop 4: Daisho-in Temple and Mount Misen
Tags: Spiritual atmosphere · Stairs and slopes · Weather-sensitive · Best for active travelers
My honest review: Daisho-in is the place that turns Miyajima from a famous photograph into a full travel day. It has texture, shade, small details and far fewer bottlenecks than the shrine approach. Mount Misen is rewarding in clear weather, but the ropeway is often misunderstood. The Shishiiwa view is the sensible turnaround for many people; reaching the true summit is a separate hike, not a five-minute extension.
✅ What Other Travelers Say: Active travelers praise the Seto Inland Sea views and the feeling of escaping the shopping street. Daisho-in is frequently described as a surprise favorite because it feels varied and contemplative.
⚠️ The Catch (Things to Keep in Mind): Wind, thunderstorms or maintenance can stop the ropeway. The summit trail is hot and exposed in summer, slippery in wet weather and demanding for knees. The final downhill boarding time is firm; missing it creates a long walk back.
📍 Stop 5: Shukkeien Garden and Hiroshima Castle Grounds
Tags: Quiet final day · Reconstruction history · Near Hiroshima Station · Main keep closed
My honest review: Shukkeien earns its place because it slows the trip down after two intense days. It is compact enough for a departure day but detailed enough to reward an hour. Hiroshima Castle is now best approached as a landscape and history stop rather than a tower museum. The grounds, Ninomaru and surrounding cultural facilities remain useful, but I would not build the whole day around the castle exterior.
✅ What Other Travelers Say: Garden visitors often mention that they stayed longer than planned, especially during blossoms and autumn color. The castle grounds remain popular for photographs, the moat and a sense of Hiroshima’s prewar history.
⚠️ The Catch (Things to Keep in Mind): The main keep closed permanently to visitors on March 22, 2026. Some search results, map descriptions and old videos still show interior exhibits and observation views. Garden paths are uneven in places, and seasonal beauty varies.
Key FAQs
Is three days in Hiroshima enough for Hiroshima city and Miyajima?
Yes. Three days is the sweet spot for a first visit when you give central Hiroshima one full day, Miyajima one full day and keep a flexible final day for Shukkeien, the castle grounds, museums, food and departure. It is not enough for Hiroshima city, Miyajima, Onomichi, Okunoshima and Iwakuni without turning the trip into repeated transit.
Should I visit Hiroshima Peace Memorial Park and Miyajima on the same day?
Only when you genuinely have one day and accept a compressed experience. Independent travelers with three days should separate them. The museum can take two hours or more, Miyajima’s best experience depends on an early arrival, and the ropeway closes much earlier than city attractions.
Where is the best area to stay for a 3-day Hiroshima itinerary without a car?
Choose Hiroshima Station for Shinkansen access, the airport bus, luggage and the fastest JR trip to Miyajimaguchi. Choose Kamiyacho, Hatchobori or Hondori for walkable restaurants, Peace Park and central nightlife. Both work without a car; the right choice depends on whether rail convenience or evening walkability matters more.
Final Verdict and Your Next Step
The best Hiroshima trip is not the one with the most prefectural pins. It is the one that gives the Peace Memorial Museum enough respect, reaches Miyajima before the crowd wave, keeps the mountain optional, and finishes with a calm final day instead of a missed connection. Use one hotel, leave the suitcase behind and protect Day 2 from unnecessary appointments.
Your first booking should be the Hiroshima Peace Memorial Museum, particularly for an early or late reserved period. After that, check Miyajima’s tide table and the ropeway’s designated reservation dates. Buy the shrine and garden tickets on site unless an attraction bundle is genuinely cheaper for the places you already intend to visit.
Book or check the Hiroshima Peace Memorial Museum ticket on Klook
Traveling from Osaka or Kyoto and making several additional covered JR journeys within five consecutive days? Compare the regional pass price with individual Shinkansen tickets before buying: